Facebook and JANDI Integration via Webhooks
Managing single or multiple Facebook pages?
Want to be notified when a new post goes live or if your page has been recommended?
Get all these notifications without leaving JANDI.
Here’s how using, webhooks.
But before that, what are webhooks? Webhooks are one way that apps can send automated messages or information to other apps. It’s how PayPal tells your accounting app when your clients pay you, how Twilio routes phone calls to your number, and how WooCommerce can notify you about new orders in Slack. Read more about it here.
You don’t need any coding for the following steps. It’s that simple.
However, please ensure you have admin rights to the Facebook page(s) you would like to integrate using webhooks [Relevant to Step 4 below]
Before getting started, it’s recommended to sign up as a JANDI beta tester on Zapier. The steps are easy to follow.
Register JANDI Beta Tester on Zapier
- Zapier is an online automation tool that connects apps and services. You can connect two or more apps to automate repetitive tasks without coding or relying on developers to build the integration. (*Learn Key concepts in Zapier)
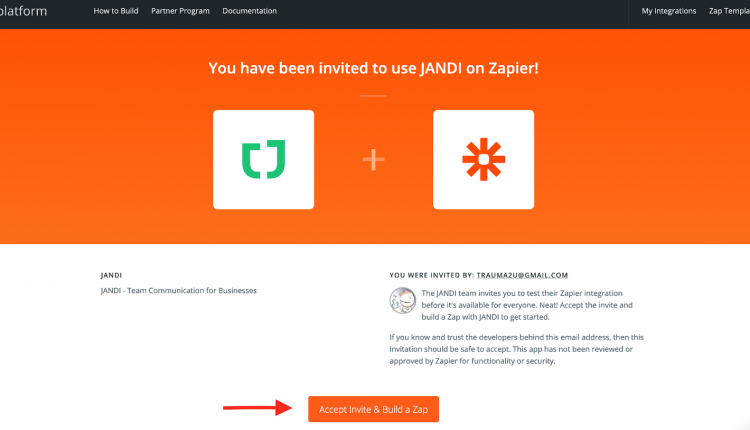
- To be a JANDI beta tester on Zapier click on the highlighted link below (this takes you Zapier), then click [Accept Invite & Build Zap] and login.
Register JANDI Beta Tester on Zapier : bit.ly/zapier-jandi
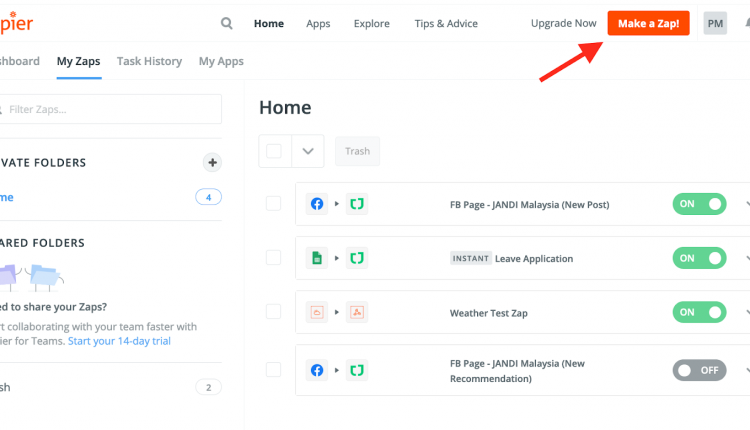
1 – Once you are logged in Zapier, click on the [Make a Zap!] button at the upper right-hand corner of the main screen. A zap is a unit of connecting apps for Zapier services
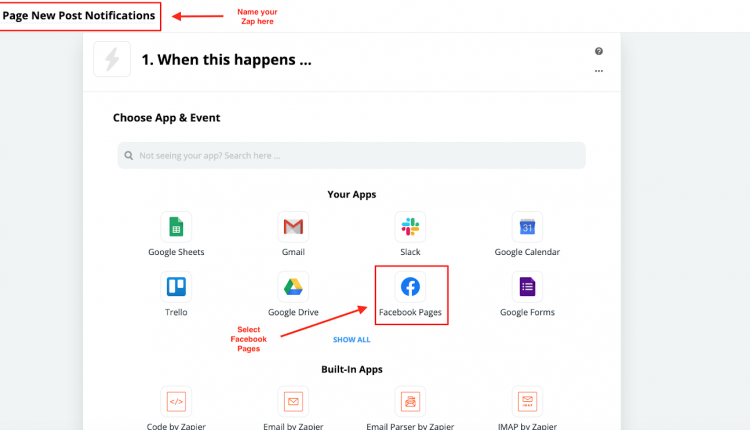
2 – [Name your Zap] and [Select Facebook Pages]
3 – Login into the [Facebook Page account] which is used to manage Facebook Pages. Select [CONTINUE]
4 – Select the Page associated with your account and hit [CONTINUE]. If you don’t see any page from the dropdown box, please check if you have been granted admin access to the Facebook Page.
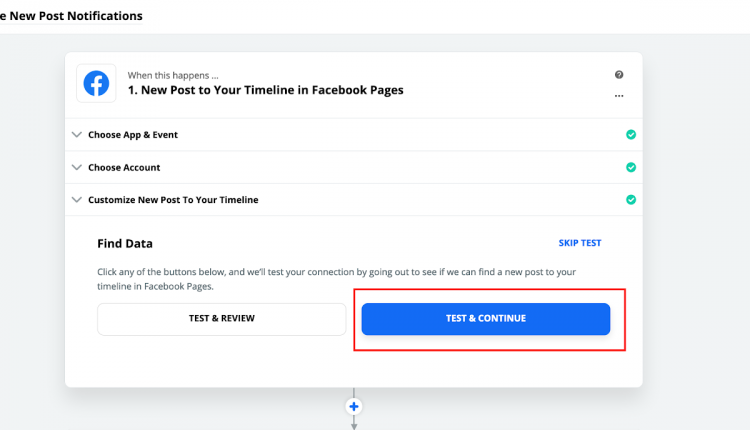
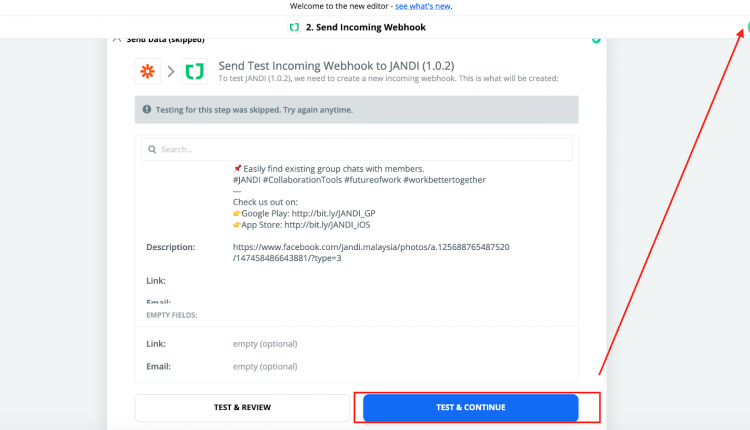
5 – Select [TEST AND CONTINUE]
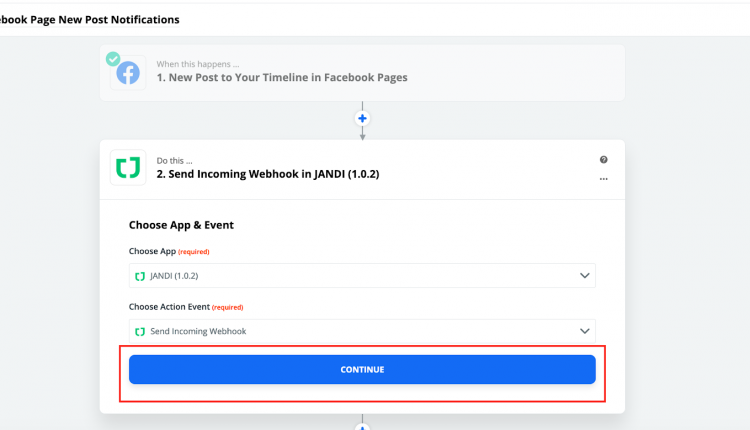
6 – In the Search box, type [JANDI] and select [JANDI (1.0.2)]
7 – Choose Action Event will automatically be set to [Send Incoming Webhook]. Select [CONTINUE]
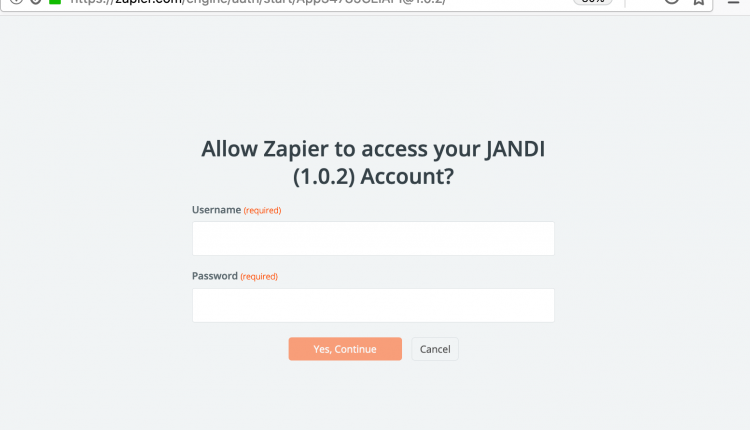
8 – You’ll see a request to log in to your JANDI account. Please insert [USERNAME]* and [PASSWORD].
*Note: [USERNAME] is an email for JANDI account log-in.
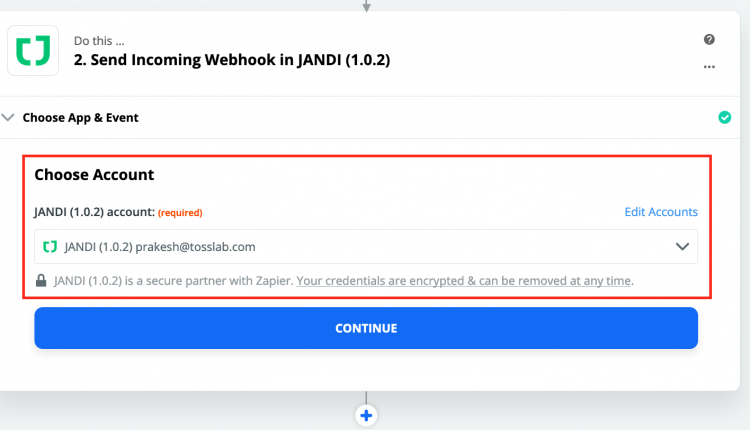
9 – Upon successful login into your JANDI account, you will see the following screen. Hit [CONTINUE]
10 – Next, switch to your JANDI application and select [JANDI CONNECT]. Hint: Icon resembling a plug/connector. Select [Add]
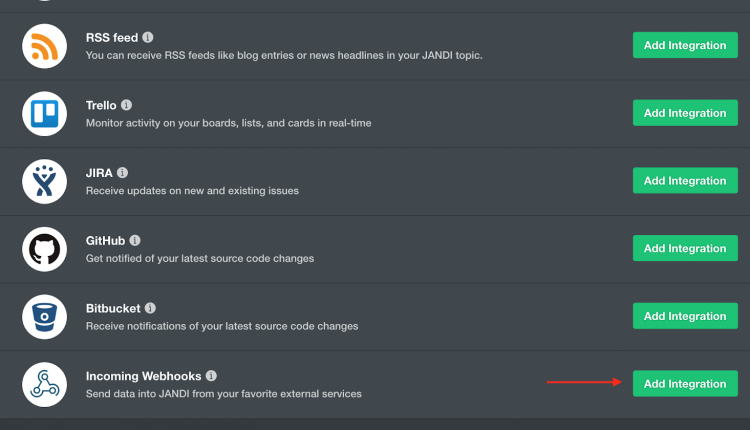
11 – Scroll to Incoming Webhooks and select [ADD INTEGRATION]
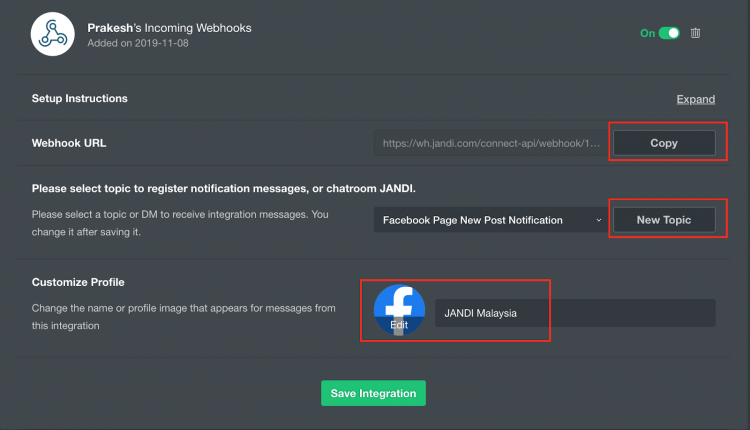
12 – Click on the [COPY] button to save the webhook URL to the clipboard:
- Please check if the topic to be linked is set properly or create a [NEW TOPIC]
- Optional: [EDIT] the profile picture and rename the webhook,
Click [SAVE INTEGRATION] button and JANDI connect webhook is ready for a new post from Facebook Page.
13 – Customize incoming webhook in Zapier
- Paste the URL link copied earlier in the box shown (A)
- Type “New Post” in (B)
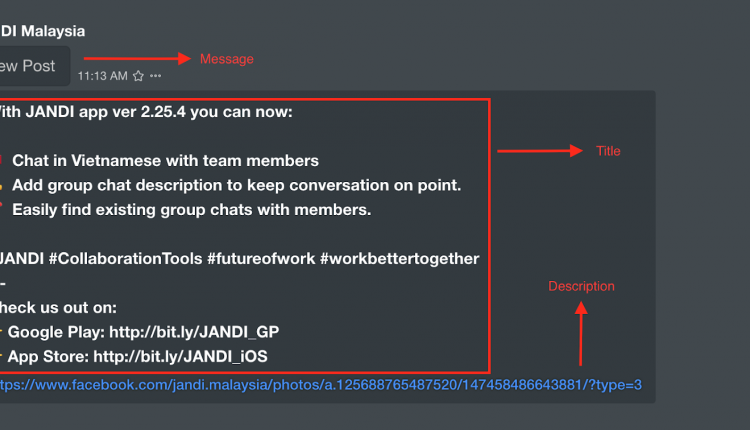
- Click [=+] and select “Message” for the Title (C)
- Click [=+] and select “Link” for the Description (D)
*Note: There are a variety of input but for this exercise, we have selected those above
Select [CONTINUE]
14 – Test and Turn on Zap
15 – Tadaaa!! Facebook New Post Notification on JANDI:
Note: For multiple Facebook Page New Post notifications in the same Topic, repeat Step 4 and by creating a new Zap.


