

Let’s Connect monday.com and JANDI
monday.com is a well-known project management tool. JANDI is further focused on coveying instant messages among team members. Therefore, to manage more complicated projects using both monday.com and JANDI will be a good answer.
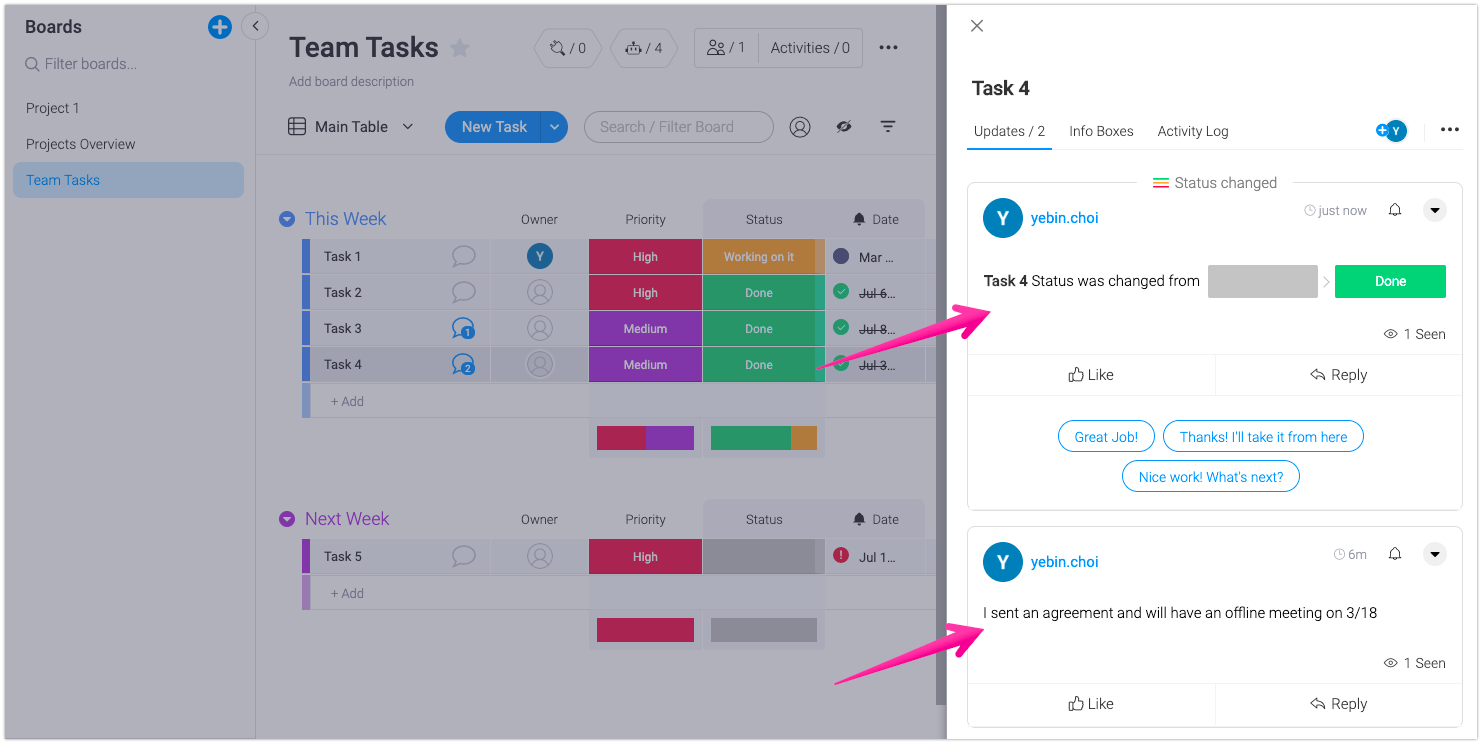
monday.com’s board is divided into 3 elements.
- Board : A dashboard to show the full glance of the projects
- Task (Pulse) : Each task or an individual row (or line item) in a group
- Update : Updates show status changes of columns in each task or comment.
- Task (Pulse) : Each task or an individual row (or line item) in a group

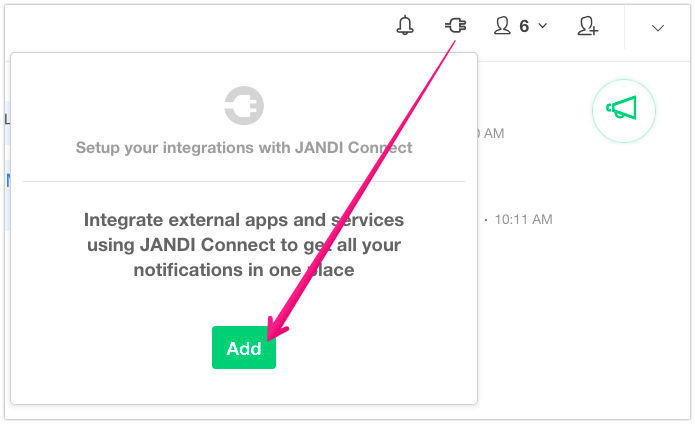
1. Make a JANDI connect
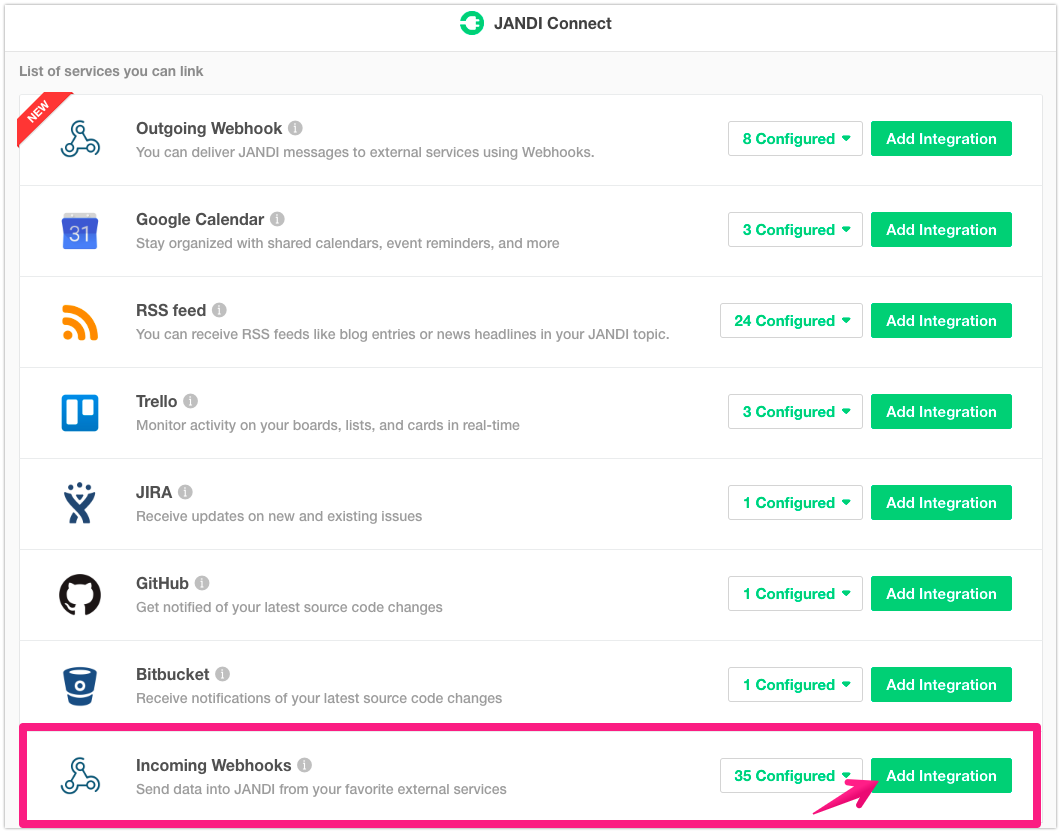
1-1) Click [JANDI Connect] button at the upper right of the topic you want to connect the monday.com notification bot and add an Incoming Webhook Integration.
1-2) Click the [Save Integration] button to complete JANDI connect webhook making.
- Copy the Incoming Webhook URL by clicking the ‘Copy’ button.
- Select a topic to connect a translator bot. If you need to create a new topic, click the ‘New Topic’ button.
- Set the message profile image and name. I entered the monday.com logo as a profile image.

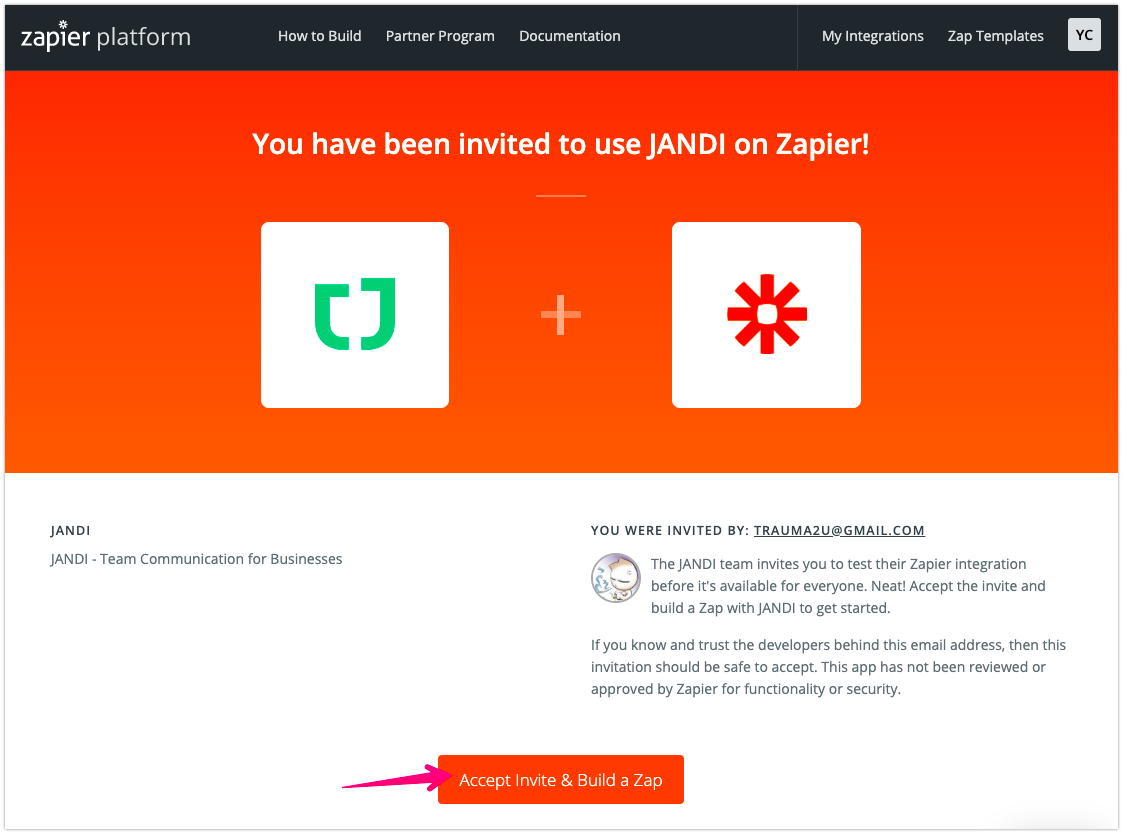
2. Register JANDI Beta Tester on Zapier
- Move to Zapier and be a JANDI beta tester.
- Zapier is an online automation tool that connects apps and services. You can connect two or more apps to automate repetitive tasks without coding or relying on developers to build the integration. (*Learn Key concepts in Zapier)
- To be a JANDI beta tester on Zapier, click [Accept Invite & Build Zap] and login.
Register JANDI Beta Tester on Zapier
: bit.ly/zapier-jandi
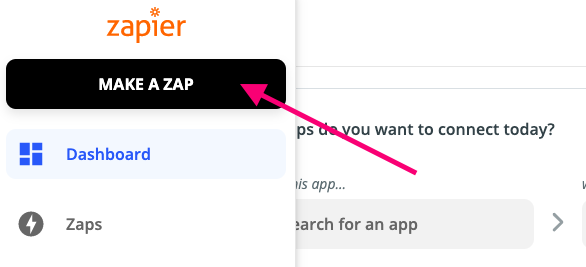
3. Make a Zap
3-1) Once you are logged in Zapier, click on the [Make a Zap!] button at the upper right-hand corner of the main screen.
- A zap is a unit of connecting apps for Zapier services.
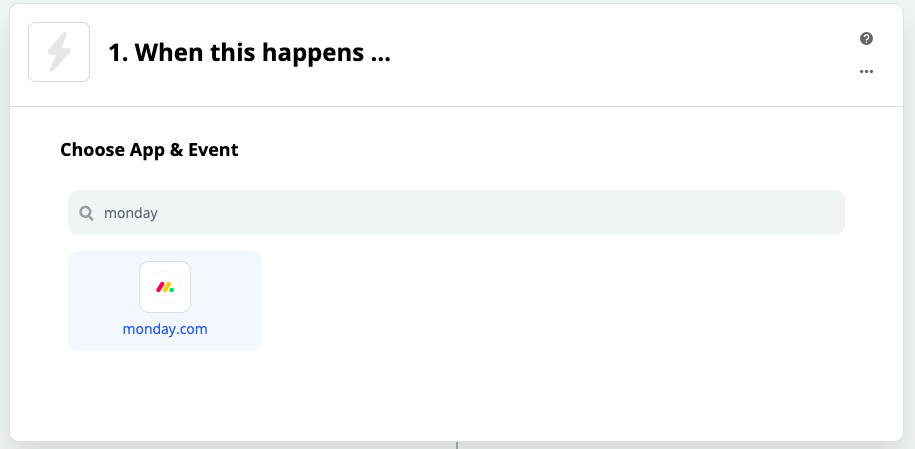
3-2) Search and select the ‘monday.com’ app on the ‘1. When this happens…’ step.
3-3) Select Trigger Event as New Update. This is to send a notification message to the JANDI whenever a new update happens on the monday.com account.
Of course, you can select different triggers to get the other kind of notifications.
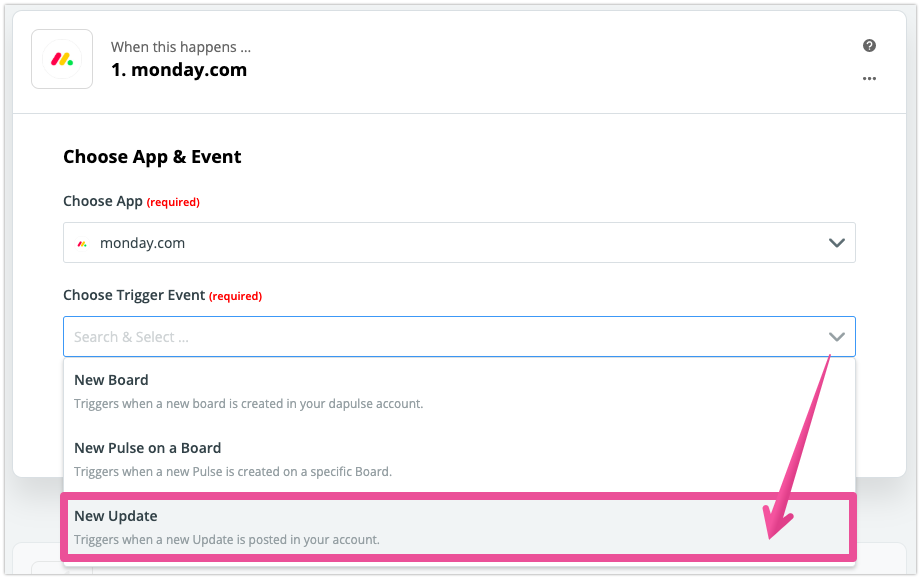
Updates are logged on this each task’s pannel.
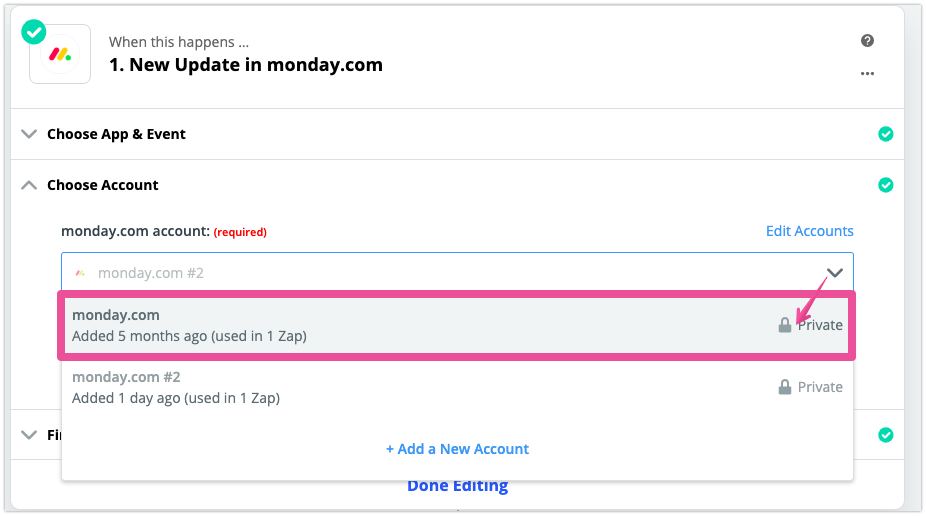
3-4) log in to the monday.com account. Then press the ‘Continue’.
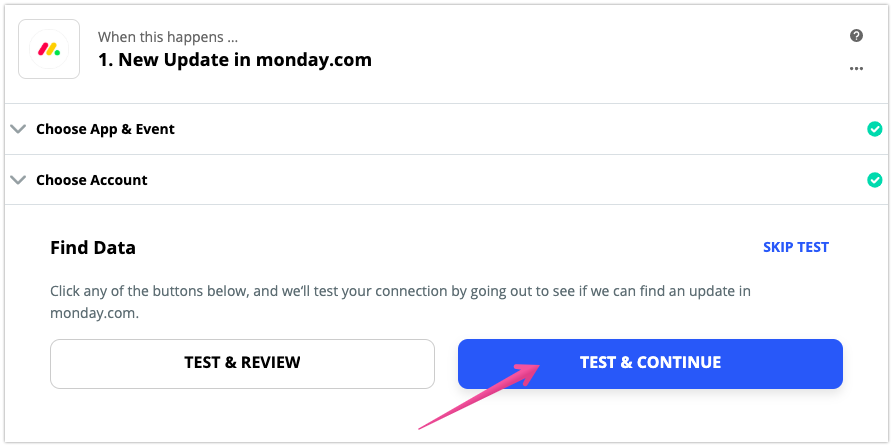
3-5) Now, make sure! Press the [Test & Continue] button to verify that the data is successfully connected. If the test is not working, it causes errors.
If the test confirms that the sample data are connected properly, click the [Done Editing] button to proceed to the next step.
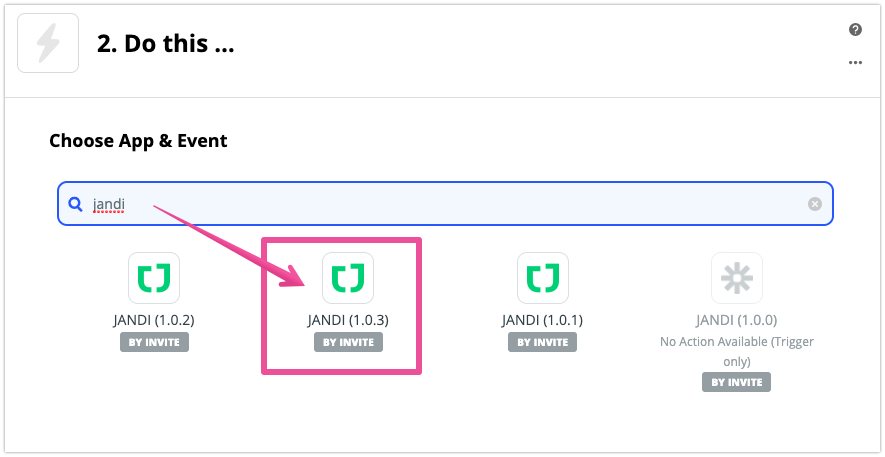
3-6) Now convert the data from the monday.com to the JANDI message. Search ‘JANDI’ and choose the app on ‘2. Do this…’ step.
- if the JANDI app is not searchable, please register JANDI beta tester again.
- If you get multiple versions of JANDI 1.0.x, choose the latest version with the highest number.
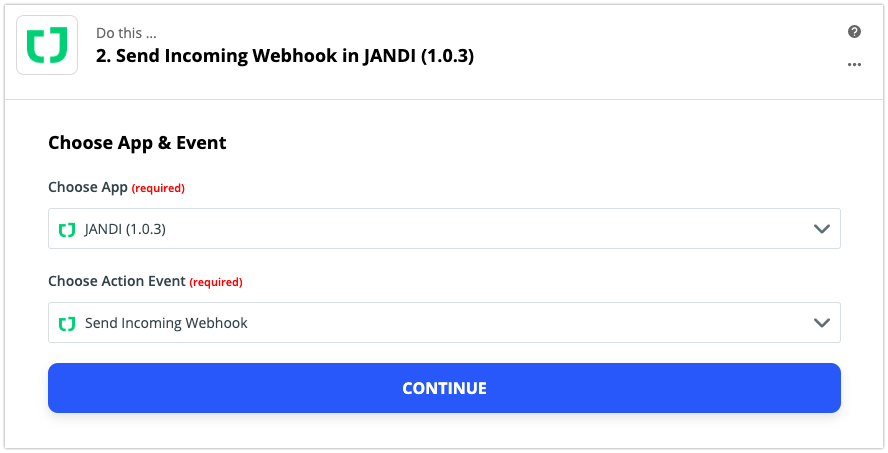
Action event is automatically selected as ‘Send Incoming Webbook’. When finished, click the [CONTINUE] button to move on to the next step.
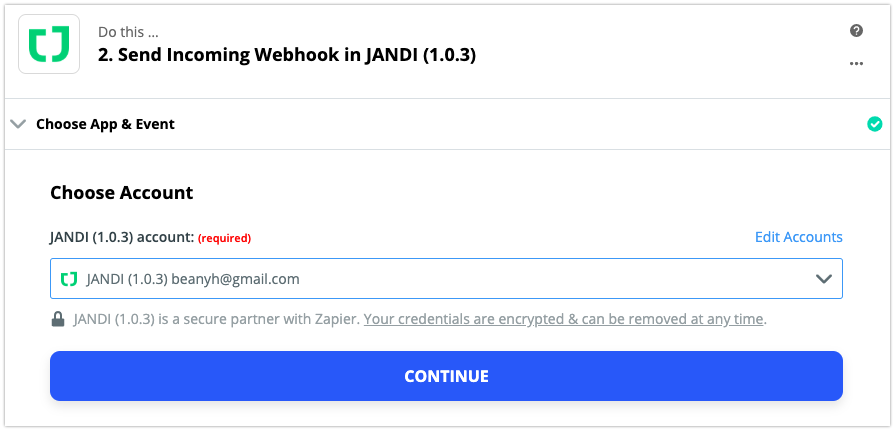
3-7) login JANDI account.
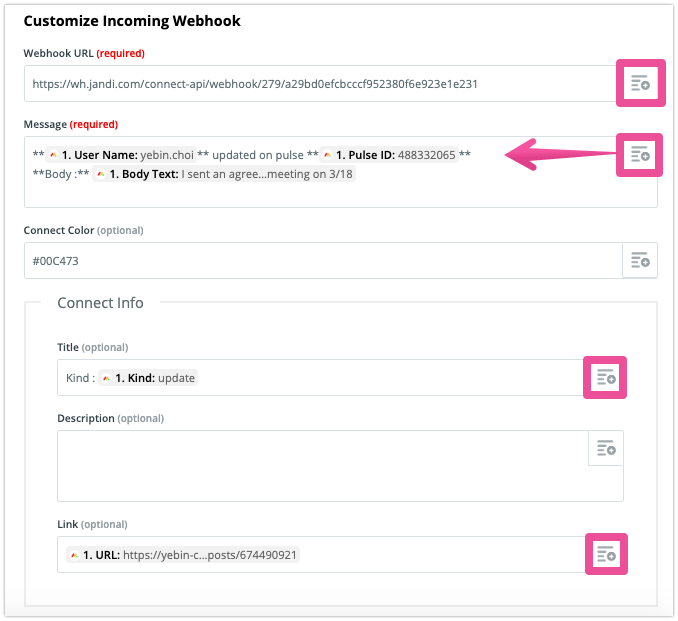
3-8) Set the webhook information you will receive on JANDI.
- In the Webhook URL section, paste the JANDI webhook URL that you copied in step 1-2) above.
- Select data to input in Message, Title, and Description.
- By clicking the [= +] button, you can enter the data from monday.com.
- You can also type in your own text, such as “Body” or “Kind”
- Please fill in the Link section with monday.com updates’ URL.
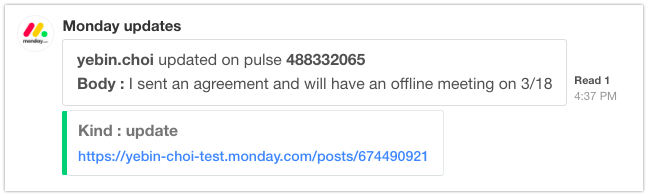
⬇︎
< Example of JANDI Message Templates >
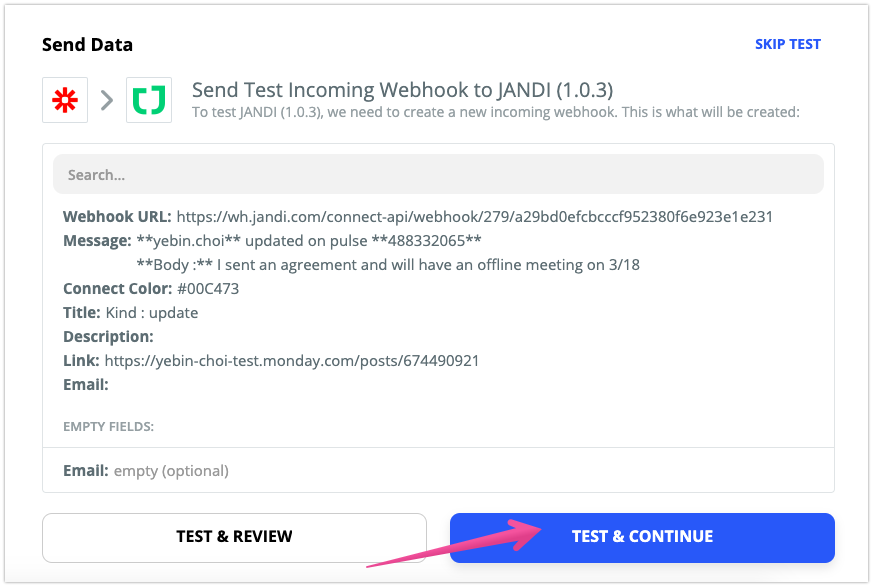
3-9) Last, click the [TEST & CONTINUE] button to test for JANDI webhook messages.
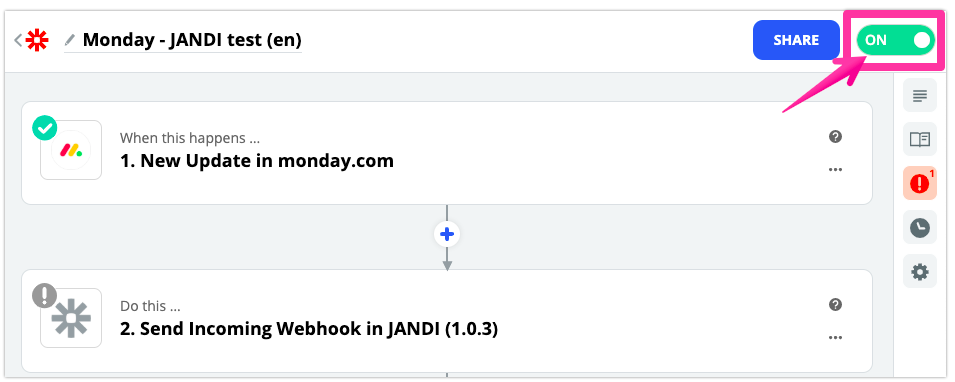
3-10) Please make sure to turn Zap [On] at the top right screen. Only when Zap is on, you can get JANDI notifications.
? I showed you how to integrate, the project management tool, monday.com to JANDI. If you are stuck in the process, please contact support@tosslab.com freely.

Comments are closed, but trackbacks and pingbacks are open.